Actions and Settings
Actions and Settings allow you to control the status of your fleets and the devices that are part of it during runtime. Most operations can be applied in one of three ways:
- Accessing the Settings tab from the fleet summary page allows you to make changes to the fleet in general, and to all the devices in that fleet.
- The Actions or Settings menu on the device summary page lets you apply changes that only affect that one device.
- To apply operations on a subset of devices, you can specify which devices will be affected by clicking the check boxes next to the devices in the devices list. When selected, use the Modify dropdown menu on the devices list to apply the operation on only the selected devices. This is helpful in case you use filters or a saved view to run operations frequently on a subset of devices.
Device actions
Fleet members with the Operator role and above can perform any of the actions or settings listed below.
Restart Services
The Restart Services action restarts the currently running services for all devices in your fleet. Your fleet's running containers will be removed and recreated from scratch. This behavior is intended and is different from running balena restart [OPTIONS] CONTAINER [CONTAINER...] in a host OS terminal instance from your dashboard, which will not remove your containers. If you are trying to persist data between container removals, see persistent storage for strategies.
By removing containers and recreating them from scratch, we see benefits like the following:
Containers are meant to be ephemeral, meaning that a new container should be a drop-in replacement for an old container with minimal to no impact. Removing and recreating containers adheres to this philosophy.
Because containers are removed and recreated with the restart action, you're encouraged to follow best practices in Docker data persistence. For more information, see our persistent storage documentation or Docker's data persistence strategies. These strategies also offer a performance boost over storing files in the container's writable layer.
Removing and recreating containers may allow recovery from release bugs where the container was stuck in an invalid state. For example, a process ID file that is no longer valid but is persisted to the container filesystem would be cleaned up when recreating the container.
When the containers are being restarted, the containers are politely asked to stop by sending a SIGTERM. If the containers haven't stopped after 10 seconds, a SIGKILL is sent.
Note: During a restart any data that is not stored in /data will be lost.
It should be noted that currently these action notifications are not queued up, so if a device is offline when the action is triggered, it will never be notified of it.
Warning: Restart device container is not equivalent to a reboot of the device!
Purge Data
This action clears persistent storage on any applicable devices. For devices running balenaOS versions before 2.12.0, this means clearing the /data folder in the container (and the associated volume at /mnt/data/resin-data). On newer balenaOS versions, this action deletes all named volumes and recreates them as empty.
It should be noted that currently these action notifications are not queued up, so if a device is offline when the action is triggered, it will never be notified of it.
Warning: This action is only supported on devices with an Agent version >= 1.1.0
Reboot
This action allows you to perform a reboot on your devices. This is different from the Restart Services action mentioned above. With this action, the entire device, including the kernel, will be rebooted as if there was a power cycle. It should be noted that currently these action notifications are not queued up, so if a device is offline when the action is triggered, it will never be notified of the action it missed.
Warning: This action is only supported on devices with an Agent version >= 1.1.0
Shutdown
The Shutdown action allows you to safely shut down your devices. It should be noted that once you trigger this action, there is no way for balena to start your device back up, so you will need to physically restart your device. Obviously this action is not a wise choice if your device is somewhere remote and inaccessible
Warning: This action is only supported on devices with an Agent version >= 1.1.0
Delete Device
The Delete Device action is an extremely dangerous action and results in disassociating the device from the fleet and remote endpoint. Once you have deleted a device from the fleet it is not possible to reconnect to it unless you set it back up again. The device itself will continue to run the container and code you pushed most recently, but will never be able to receive new updates or commands from the balena dashboard or API.
Device settings
Fleet members with the Operator role and above can perform any of the actions listed below.
Public Device URL
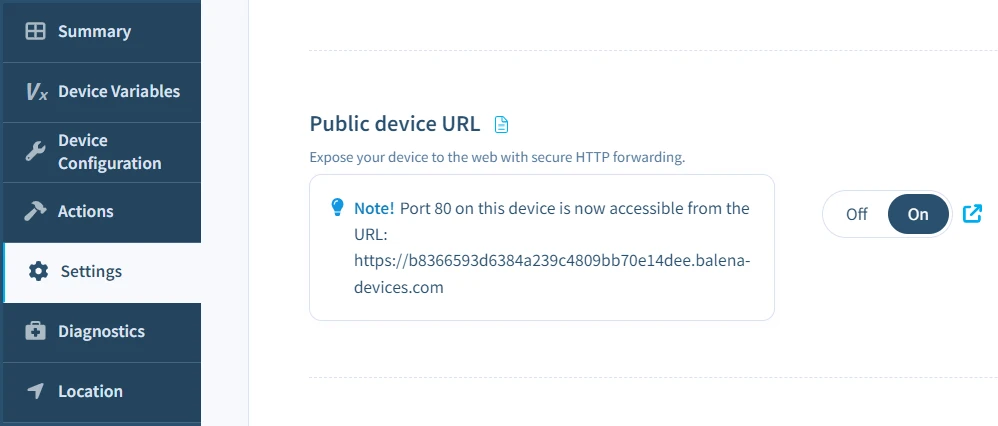
Balena currently exposes port 80 for web forwarding. This setting enables web forwarding and generates a web accessible url for any applicable devices. The URLs will be of the form <BALENA_DEVICE_UUID>.balena-devices.com, where <BALENA_DEVICE_UUID> is the unique ID of the device which you can see on your dashboard. Currently only HTTP traffic (level 7 OSI traffic) is supported via the device URLs.

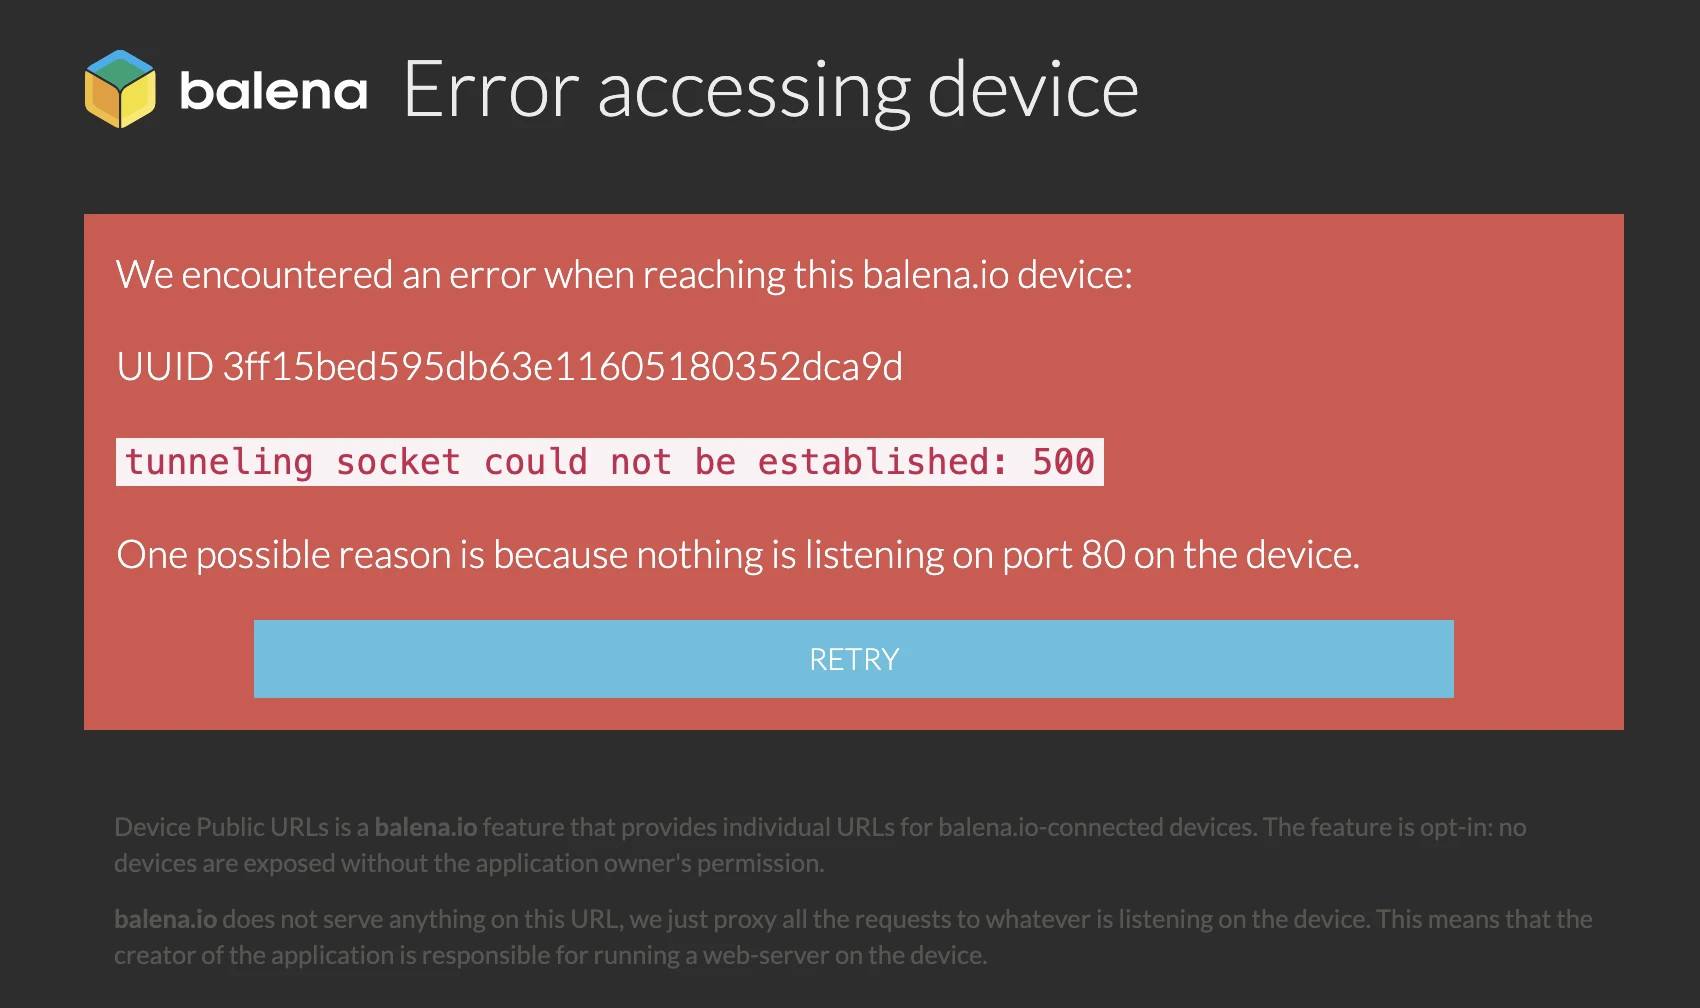
To see what your device is serving on port 80, click on the public URL. If no service inside your app is serving anything on port 80 or your webserver on the device crashes, you should see something like this:

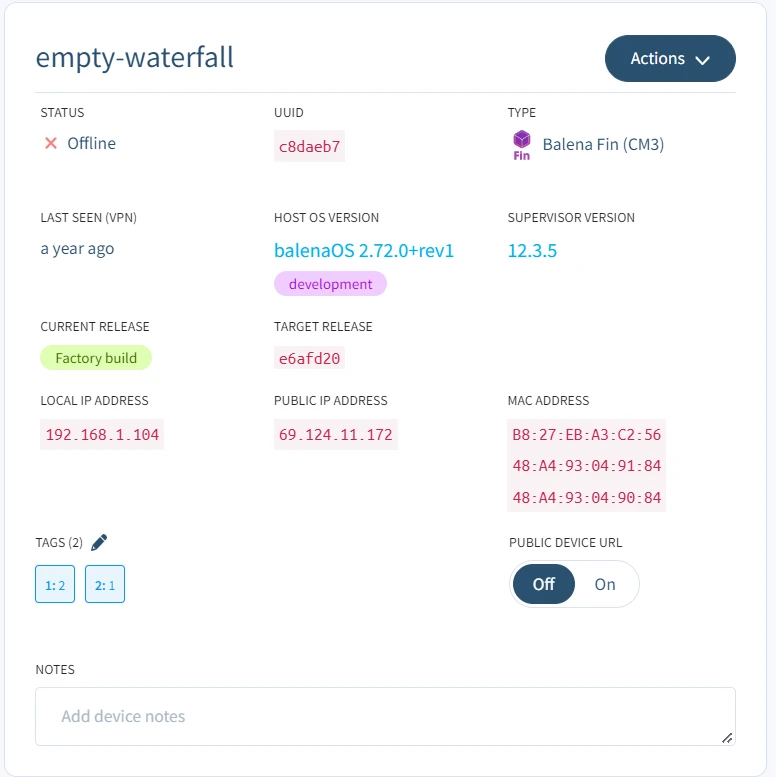
You may also enable or disable public device URLs by clicking the Public device URL toggle button on the device summary page.

Move device to another Fleet
With the Fleet setting it is possible to transfer a device from one fleet to another. This allows you to incrementally rollout devices or move certain devices to specific branches of functionality. To move a device from one fleet to another, click the Fleet dropdown on the Device Settings page and you will be presented with a list of compatible architecture fleets that you can move your device to.
Note that you are only able to move devices between fleets with device types that share the same architecture. For example, a Raspberry Pi 3 device could be moved to a BeagleBone Black fleet, but not to an Intel NUC fleet.
Obviously you may only select one fleet to transfer your device to. Once you select the appropriate radio button, your device will immediately appear in the selected fleet's device list. Note that it will take a while for the device to start the update process as it does not receive a push notification of a new code update from the API, so it has to wait for the update poll, which happens every couple of minutes.
Warning: For devices running balenaOS version 2.12.0 and above, data in persistent storage (named volumes) is automatically purged when a device is moved to a new fleet. On older host OS versions, the /data folder in the new fleet will not contain any of the old fleet data, but it can still be accessed via the host OS and if the device is switched back to the original fleet. Unless you plan to revert back to the original fleet, be sure to purge the /data folder.
BalenaOS Update
This setting allows you to remotely update the host OS running on your device. For more details on supported devices and the update process, check out our balenaOS update documentation.
Local Mode
Turning on local mode is useful when you are prototyping your services, as it allows you to push changes to your device over the local network without relying on the balena build pipeline. You can find more information in our development guide.
Deactivate Device
This setting will deactivate the device and charge a one-time deactivation fee (equivalent to the cost of a single undiscounted device-month) that is not covered by your plan's allowance. To deactivate, the device must be offline and be attached to a valid billing account.
Once the device is deactivated, the device won't be counted towards your device total. It will remain inactive until it comes back online.
Grant Support Access
This setting allows you to enable support access for one or more devices for a set time period.
Fleet/Block/App settings
These settings can be found on the "Settings" menu for each fleet and apply to the fleet and all the devices in the fleet. Fleet members with the administrator role can perform any of the settings listed below.
Change Fleet Type
This option allows you to convert your fleet to another type, as long as the devices in the fleet meet the balenaOS version requirements and your account has the appropriate privileges.
Rename Fleet
This operation allows you to rename your fleet. This operation is only available Microservices and Essentials fleet types. It's not currently possible to rename Legacy or Classic fleets, you will first need to upgrade your fleet type.
Transfer Fleet Ownership
Fleets with all their associated devices, releases and members can be transferred to any other balenaCloud organization. Upon transfer, your fleet ID and UUID will remain the same, fleet history will be maintained, and you will be able to roll back to a prior release.
Fleet transfers are between a source and a target organization. If you are transferring a source fleet from a paid plan to a free plan and your fleet exceeds the device limit, your fleet will be frozen until a plan is purchased for the target organization.
Only organization administrators can initiate and complete fleet transfers. You must coordinate with one of the receiving organization's administrators to perform the following actions:
- Take note of the fleet name in the source organization and your balenaCloud username (in the top-right drop-down menu).
- Ask an administrator of the target balenaCloud organization to create a new empty fleet using the same fleet name (the fleet type doesn't need to match).
- Ask the administrator of the target balenaCloud organization to add you as a member of the newly created fleet with a
Developerrole, using your username. If you are an administrator of the target organization, you already have access to the new fleet & this step can be skipped. - In the source organization, select
--> Settings --> Set this fleet's ownership and pick the target organization from the list to complete the transfer.
Note: If the Set this fleet's ownership button is grayed out, ensure that you have created an empty fleet in the target organization with the same name as the source fleet, and that the user that is transferring ownership of the fleet from the source organization has been added as a Developer to the target fleet.
Once the transfer of ownership has been completed, the source fleet owner will no longer be a member of the target fleet. If required, you will need to invite them to become a member of the fleet again. All other members of the source fleet will retain their membership of the target fleet once the transfer is complete.
During and after the transfer process, the devices state will remain unchanged from before the transfer process was started. For example, devices that were online before the process was started will remain online throughout.
Transfer Block Ownership
Blocks with all their associated releases and members can be transferred to any other balenaCloud organization. Block transfers are between a source and a target organization.
Only organization administrators can initiate and complete block transfers. You must coordinate with one of the receiving organization's administrators to perform the following actions:
- Take note of the block name in the source organization and your balenaCloud username (in the top-right drop-down menu).
- Ask an administrator of the target balenaCloud organization to create a new empty block using the same block name.
- Ask the administrator of the target balenaCloud organization to add you as a member of the newly created block with a
Developerrole, using your username. If you are an administrator of the target organization, you already have access to the new block & this step can be skipped. - In the source organization, select
--> Settings --> Set this block's ownership and pick the target organization from the list to complete the transfer.
Note: If the Set this block's ownership button is grayed out, ensure that you have created an empty block in the target organization with the same name as the source block, and that user that is transferring ownership of the block from the source organization has been added as a Developer to the target block.
Once the transfer of ownership has been completed, the source block owner will no longer be a member of the target block. If required, you will need to invite them to become a member of the block again. All other members of the source block will retain their membership of the target block once the transfer is complete.
Delete Fleet
This option permanently deletes your fleet.
Warning: It is a good idea to move your devices to another fleet before deleting your current fleet. If you do not, all devices attached to the fleet will become orphaned and you will need to reconfigure them from scratch. The most recent code deployment will continue to function as before, but the devices will not be able to receive code updates or device operations from balena.
Release settings
These settings can be found on the "Settings" menu for each release.
Validation Status
This option can be used to mark your release as valid or invalid. Entities can only be pinned to valid releases. If you invalidate a release, any devices that are running it and are not pinned to it will be updated to the fleet's target release. If an entity is pinned to a release when it is invalidated, it will not be affected. If you wish to allow pinning to the release again, you could re-validate it via this same setting.
Delete Release
This option permanently deletes your release. This may be the setting you want to use if you want to clean up releases beyond simply invalidating releases.
Info: If you have a device preloaded with an OS version lower than 2.113.14 and a release, and you delete the release before provisioning the device, then when the device provisions it will be in a VPN-only state. To fix this, you must update the supervisor on the device to version 14.9.4 or higher.